The cigarette holder has come back into fashion. Who invented it? What is a mouthpiece for? How to make it? This will be discussed in the article. So.
What is a mouthpiece?
If we translate the word “mouthpiece” from German, we get two roots: mund (i.e., “mouth”) and stück (“part”). It turns out that we are talking about part of the mouth? Yes. Today it is the part of the cigarette that is called the filter. However, previously the mouthpiece was a hollow thin tube made of wood. A cigarette was inserted into it.
When and by whom was the mouthpiece invented?
Tobacco was brought to Europe in 1496 from the island of Tobago. They only smoked cigars back then. Soon tubes appeared. Tobacco was quite expensive, so the unsmoked remains were crumbled and wrapped in paper. These roll-your-own cigarettes were the prototype of modern cigarettes. They became especially widespread during the First World War (tobacco was included in rations).
In 1865, two emigrant brothers named Capp opened a small pipe shop in Dublin. For ten years, things went calmly and smoothly, until a certain Charles Peterson appeared in the town. Soon he asked to be a partner with his brothers, and things went up: Peterson invented a cigarette holder, which was appreciated at the World Exhibition, noting the invention with a gold medal. Amazingly beautiful products marked “Capp&Peterson” are now sold all over the world. I wonder if Charles Peterson had any idea that an invention that was supposed to only prevent tobacco from getting into the mouth would become so widespread?
Requirements and differences
When the harm of smoking was assessed, it turned out that the cigarette holder reduces (albeit slightly, but still) the volume and activity harmful substances inhaled when smoking. It turned out that the smoke, passing through the air corridor, cooled, and some of the resins remained on the walls of the tube. Some devices began to be equipped with filters that further retained harmful substances.
A cigarette holder can be made of various materials. The main thing is that it is indifferent, resistant to temperature, smoke and attractive in appearance.
Today there are many types of mouthpieces (for cigarettes and cigars). They are distinguished by the following parameters:
- concepts (with filter, cooler);
- designs (taking into account length, thickness);
- material (ebony, acrylic, wood, amber, animal bone, Mediterranean briar);
- technologies (handmade, machine-made, stamped).

Mouthpieces for men and women
And now - a little about the details. How is a man's cigarette holder different from a women's? It must be said that this device became an element of sophistication during the introduction of fashion for women smoking (19th century). Rough and thick cigarette holders clearly did not suit elegant and sophisticated ladies with manicured fingers. In addition, the smoke penetrated the gloves, leaving bad smell And yellow spots. The long cigarette holder was designed to protect against these troubles. And it looked much prettier on a woman’s thin fingers than on a man’s. The cigarette holder for women turned into an accessory for fashionistas of that time. It was made from quite expensive materials - amber, mahogany. Mouthpieces with inlay were especially valued. Men were more practical by nature. That’s why their mouthpieces were simpler and smaller. Firstly, they were more convenient to store, and secondly, they were not as fragile as women's ones.
With the advent of filter cigarettes, mouthpieces began to fall out of use and remained in use only among a few smokers. Today they are back in fashion. The greatest demand is for cigarette filter mouthpieces. Prices are suitable for any budget: from cheap (from 10 USD for men and from 15-20 USD for women) to quite expensive.
How to make a cigarette holder?

The product usually consists of three parts: a core, a so-called nipple and a tip. Don't try to make a mouthpiece from scrap materials. Sometimes it is advised to remove the “innards” from a pen or felt-tip pen and use a hollow tube. In no case! Firstly, the tip must be conical. To make it you will need bronze. The core can be made of any other material. And for the nipple sleeve, textolite or organizational material is suitable. Holes of the appropriate size are drilled in the parts and then connected. If the ebonite mouthpiece slips out of the shank or stays loose in it, heat the bushing in boiling water and press it onto a hard surface. The diameter will become larger and it will hold much tighter.
Special pastes are used for cleaning. However, not everyone has them. Alternative option- dentifrice. If you have trouble finding it on sale, squeeze a little toothpaste onto a plate and wait until it dries, then grind it into a powder.

Rice. 3. Clip with lock: 1 - flat spring; 2 - pin, 3 - shell box; 4 - drawer
The use of brass and copper makes it possible to obtain strong soldered seam connections and fixation of staples, but requires coating the outside of the clip with durable varnish or synthetic self-adhesive film so that the clip does not oxidize. The height of the sides enclosing the grater is approximately equal to half the length of the match. From the end of the clip, visible in Figure 1 on the right, the box is inserted with friction until it stops into petal 2 bent at a right angle, shown in the same figure. Semicircular recesses 3 in the walls allow you to easily push the box out of the holder in order to turn it with a fresh grater outward or replace it with a new one. Staples 1 keep the box from tipping over when a match is drawn across the grater.
A small addition to the holder in the form of a spring plate with a pin (Fig. 3) will make using the device more convenient. A pin 2 attached to a spring 1, piercing the box 3, will reliably keep both the shell of the box and its drawer 4 with matches from falling out. The spring is attached to the wall with small rivets with a countersunk head. The place for the pin (short wallpaper nail) and the hole for it in the wall should be chosen so that the back side of the drawer catches on it when
extending approximately 2/3 of the length. To ensure that the pin does not stick into the matches, but fits into the gap between them, the end of the pin should be rounded, and the volume of the box should not be completely filled.
Mouthpiece for smoking filterless cigarettes
To save money on filterless cigarettes, smokers use a mouthpiece. As a rule, the mouthpiece is made of organizational materials, for example, wood, plexiglass, ebonite, etc. The main disadvantage of such mouthpieces is that the cigarette butt remaining in the mouthpiece does not always fall out freely and sometimes has to be removed using a match or some other object. Often, removing a cigarette butt in this way leads to clogging of the smoke hole. In addition, smoking a cigarette until the butt is small leads to the melting of plexiglass, PCB or burning wood.
In order to eliminate these shortcomings, I offer a universal mouthpiece for smokers, the design of which is shown in the attached figure.
The mouthpiece consists of three parts - a tip (Fig. 1, c), a core (Fig. 1, 6) and a nipple (Fig. 1, a). The tip is made, for example, of bronze and has a conical entrance to seal the cigarette. The core is made of any metal. The nipple sleeve is made of organizational materials, for example, textolite. The core is inserted into the tip and secured to the nipple sleeve using a threaded connection, for which a slot for a screwdriver blade is made at the end of the core. To seal the connection between the core and the tip, an annular groove is made in the core body, into which a rubber ring of the appropriate diameter and thickness is inserted, and in the absence of a ring, sealing can be done by winding sewing threads into the groove (Fig. 1, e). The bronze tip is mounted on the core using a sliding fit and can move on it within 10 mm. This movement
#1 BORODIN
I took the liberty of:
Namesake, I experimented with pipes in every way in order to obtain the ideal smoking instrument. And these are the results I have here. Of course, many things are important in a trumpet, but the mouthpiece comes first. Trees later. The wood must be free of defects and have correctly drilled holes. Dryness (seasoning of the briar) is also important. Fresh briar smokes wet, even if it is dry. I don't know why. Plus, fresh briar wanders around and problems arise with the trunnion; steps can come out at the junction of the shank and the munsch. By and large, that’s all.
There's a lot more to the munsch. Taste, snotty, cold smoking - this is basically the munsch. How it's made. Plus its length. Length is very important as it turns out. I always try to improve the insides of the munsch, no matter how funny it may seem. At this stage I do this option:
Taper of the channel is required, and taper with a certain difference in diameters. The bell of the mouthpiece expands in height from the mouthpiece slit into the mouth. This is a fundamental thing that gives very good effect. The length of the socket is at least 15 mm. You can go up to 20mm, but it doesn’t matter much. There should be a step at the junction of the channel cone and the socket of the slot. This is also an important thing that affects the flow of smoke. The cone must be polished to a mirror finish. Bell too. Under these conditions the smoking is dry, not snotty and cool. Provided the tobacco has normal humidity, no additional cooling chambers, smoke flow bends, condensate collectors, or filters are needed.
Do a simple experiment, you have a lot of tubes. Take the empty pipes and blow smoke into the bowl. Cup to your lips and blow with the force with which you usually draw smoke when you smoke. Everything will immediately fall into place. In some pipes the smoke will come out of the munsch in a thin stream, while in others it will be distributed in a wider flat stream. The most pleasant smoking is when the smoke comes out of the mouthpiece as if it were a wide cone with a slight wavy edge. I showed this experiment to some of our friends and you know it was interesting. Why this happens (the influence of certain changes in the design of the munsch on the flow of smoke and the sensations when smoking) - I don’t know, it’s all from practical experiments. But it really works. And smoking is changing a lot, and tobacco is smoked differently. To feel this, choose two pipes with the same chamber parameters and the most different shape of the smoke cone from the mouthpiece. Place one tobacco in both pipes and smoke at the same time. With a thin stream the taste will be sharper and sharper, with a wide stream it will be softer and subtler.
ABOUT! This is not the voice of a carver, but of a master!
How long has this bike been gone? I’m not joking or being sarcastic; it took me many years to understand this simple fact.
I do almost all of this now on all edited tubes. Excluding filter ones, I either don’t change anything, or install an adapter (at the client’s request), or cone the ledge in the mouthpiece. In filterless ones, a cone is required; it improves the performance of the device very noticeably.
The only case, when it is not needed - when joining the trunnion and mortise “at close range”, without a gap or with a gap of no more than 1-2 mm. If the cross-section of the smoke channels of the chimney and mouthpiece is the same, and they are completely coaxial, a cone in the trunnion is not needed. But this doesn't happen on every handset, so.
I also redo the bell - I bore it both in depth and in breadth. At least one and a half centimeters, exactly as you indicated. Except for the step in the area where the smoke duct transitions into the bell - by the way, what is that for? Condensation will form on any steps.
The quality of polishing does not affect the formation of condensation - it just flows easier over smooth walls, and that’s all.
Completely and entirely. Exactly. And that’s why I never liked Peterson’s mouthpieces - they drive the smoke too precisely and aggressively, and the taste is excessive. And if the tobacco already has a strong taste, it turns out to be too much.
For the same reason, there is an urge to waste many old mouthpieces that are “buttons”. I'm holding back for now, but someday I'll try. Interesting!
Facts about smoking
Purchased smoking pipes they cannot always satisfy all the requirements, so it is better to make a unique smoking pipe with your own hands and feel like a real master. This will require the simplest materials, a little patience and imagination - and then you can get an excellent pipe of a unique and inimitable design.
Making a smoking pipe with your own hands using available materials is not so difficult, but its cost will be higher than the purchase price. Manufacturing will require some tools and materials, knowledge of the tube structure and patience, but even so, the quality of the first copies will be low.
The structure of the tube and the names of all its parts can be easily found on the Internet, as well as a diagram of its structure. If before starting work it turns out that there is no necessary tools, then the manufacture of the mouthpiece and briar will have to be abandoned.
You need to take a ready-made block and a standard acrylic mouthpiece, this will make the task much easier. You can order these elements in specialized online stores or on ad sites.
In order for the elements to fit together according to the connectors, they must be purchased from the same seller: then there will be no need to sharpen the parts, adjusting them to fit right size.
In order to make a smoking pipe, you will need a minimum set of tools:
- File;
- Sanding paper of varying degrees of grain;
- A set of drills of various diameters and lengths;
- Vise;
- Joiner's machine.
A carpenter's vice is used to work with workpieces: they increase the accuracy and quality of work. Holding the block in a vice, trace the outline of the future tube with a pencil. The excess is cut off with a hacksaw, but then you will have to process it with a file. Grinding the required form, a sanding cloth is also used. At this point this stage is completed.
Next, a drilling machine is used to quickly and accurately make a hole in the tobacco chamber. To make a hole in the channel, you need several drills with a diameter of 3-4 mm. In addition, it must be elongated - finding such a drill will not be easy, you will have to search. Or a long drill is changed by sharpening it to a curved shape.
For mortise you will need a drill with a diameter of 7-10 mm.
The drills are specially wrapped in soft material. In order not to make the hole larger than necessary, the depth of the holes is measured: the drill, lying at an angle, should not move to the side.
Start drilling at low speeds so as not to damage the workpiece with a heated drill.
Compliance with the calculated depth of the holes is necessary so that when working with the tobacco chamber you do not make a mistake. The workpiece is removed from the vice, after which the correctness of the recesses is checked. Then the mortise is drilled out: it is important to follow the marked axes.
If the drill in the channel goes to the side when drilling, you can correct the axes by changing the shape of the tube. When the hole is ready, the edge of the mortise is ground off with a file. Having completed this stage, drill a hole for the tobacco chamber.
To do this, use an already prepared curved drill. The workpiece is removed from the vice so that you can ensure that the axes are installed correctly. After this they start working again.
Drill carefully, maintaining the required depth so that the channel neatly merges with the bottom of the chamber. Drill the remaining depth by hand for greater accuracy.
The required hole depth is strictly observed. Then the mouthpiece is connected to the first workpiece by gluing. To do this, drop epoxy glue onto the bottom of the trunnion and, without changing its position on the machine, insert the trunnion into the briar.

Excess glue is removed before it dries.
Now you need to connect the mouthpiece to the briar by drilling a smoke channel in the first. You need to drill sequentially, gradually increasing the depth. The drills must be of small diameter to reach the end of the channel. Having reached the end of the workpiece, the drill will come out with reverse side. Now the workpiece is removed from the machine. Check the holes made and clean the workpiece from dust.
After connecting both parts of the tube, all that remains is to make the bell of the mouthpiece. This is the part of the tube that is directly held in the mouth, so it must have the correct diameter and be neither too narrow nor wide. For this, a special needle is used.
Carefully insert the needle into the channel and rock the workpiece until a gap of the desired diameter is formed. From this moment on, the blank ceases to be a raw product and takes on the appearance of a real smoking pipe.
To make it look truly beautiful, you need to do some sanding and polishing.
If you use a disc, it is inserted into the drilling machine and carefully lubricated with a special polishing paste. This will give the workpiece the desired smoothness and avoid damage during grinding.
Once you've finished sanding the outside, you need to sand the inside holes of the tube. To process the smoke channel, use thin wooden sticks tightly wrapped in fine-grained sanding paper. Do not use grinding paste in the mouthpiece, as it may remain on the walls of the canal.
Now the tube is almost finished and just needs to be painted to give it a finished look. To give color to a smoking pipe, stains are used. They come in several types: water-based, chemical and alcohol-based. It is best to use alcohol or water stains.
Chemical products are a mixture of chemical components that will have a detrimental effect on both the product and health. After each stage of polishing, stain is used: in this case, it will be absorbed and make the wood pattern more expressive.
When painting the tube is finished, it needs to be allowed to dry. Then the areas that need to be given a specific color or shade are painted. When the tube is completely dry, it is ready for use. When you add tobacco and light up, you can feel pleasant taste a unique homemade pipe made at home.
When and by whom was the mouthpiece invented?
Tobacco was brought to Europe in 1496 from the island of Tobago. They only smoked cigars back then. Soon tubes appeared. Tobacco was quite expensive, so the unsmoked remains were crumbled and wrapped in paper. These roll-your-own cigarettes were the prototype of modern cigarettes. They became especially widespread during the First World War (tobacco was included in rations).
In 1865, two emigrant brothers named Capp opened a small pipe shop in Dublin. For ten years, things went calmly and smoothly, until a certain Charles Peterson appeared in the town. Soon he asked to be a partner with his brothers, and things went up: Peterson invented a cigarette holder, which was appreciated at the World Exhibition, noting the invention with a gold medal.
Ladies' mouthpiece (worklog, 83 photos)
Good day, dear friends!
About three months ago the idea came to make a mouthpiece. I drew several sketches. There was a temporary pause. But after the publication of the amazingly beautiful work “Mouthpiece “Firemen Smoke Too”” from the respected “Yura”, I made a decision - I need to finish what I started.
Length when assembled: 168 mm. The weight of the mouthpiece is 24 g. So let's get started! I tried to capture the whole process. The following materials were required for manufacturing: - brass tubes, external diameter 4 mm. and 6 mm.
; - brass rods, d 4 mm. and 10 mm.; - brass sheet, 0.6 mm.
; - brass rod with M5 thread; - copper wire, 2.0 mm; 1.5 mm and 1.0 mm; - tree - black hornbeam;
First part of the mouthpiece
Processing wood parts
From a large hornbeam block (purchased in a store for modeling ships), we saw off a small 75 mm block... Place it in a lathe. We form a cylindrical surface. Then, smoothly rotating the caliper handles at the same time, we form a conical surface.
Drilling an internal hole
First we drill approximately to the middle on one side, and then on the other side. It turned out exactly :).Next, drill a 4.2 mm hole on the narrow side. to a depth of approximately 30 mm. Cut the M5 thread.
Shaping
Using a jigsaw, we saw off these parts. Then we give the shape with attachments on a Dremel.

Hornbeam polishing
During the polishing process I used the following method: alternating rubbing with wax, then sandpaper from 600 to 2000, then wax again.
Connections of 1 and 2 parts. Elements.
Second part of the mouthpiece
Connection of 2 and 1 parts

The main part is a brass tube d=6 mm. We saw off 60 mm. Next we take a 10 mm brass rod. We drill 4.2 mm, cut M5. Then we shape it on the machine. We get a part like this. We carry out soldering.
Cigarette mount
Let's take 10 mm again. rod The manufacturing process of the part is as follows. We drill 5.0 mm. We cut M6. We saw off the part and screw it onto the M6 bolt. We give it a shape. Next, we first grind off the thread by almost 80% (where the cigarette will be inserted to a depth of about 7 mm). We carry out soldering.
Intermediate photos
Let's try on what happened.
Exhaust pipe
From the brass tube d=4 mm. saw off 55 mm. Make markings in Word. We apply it to the tube. Using a punch, we make markings. We drill 1.0 mm holes. As a result, we get such a part. We estimate. We solder the wire (d = 1.5 mm) to the brass tube.
Next, we make cylinders from 3 mm copper wire. To do this, we drill a 1.6 mm hole in 3 mm copper wire, gradually sawing off 2.5 mm long cylinders... We grind the cylinders (I made this device out of a nail). We solder the cylinders on the copper wire.
Exhaust pipe mounting
From 0.6 mm. We cut out strips from a brass sheet. We give it a shape. We polish it. We bend it by 6 mm. brass tube. Then in the other direction. Drill 2 mm holes. Bend again. This is what happened. We continue to form the parts. We drill 1.0 mm. We try it on. We make rivets 2, d=2 and d=1 mm.
We carry out the riveting. Next we move on to making the exhaust pipe holder :). From 4 mm. Using a brass rod, we turn out the part on a machine. We drill a 1.6 mm hole to a depth of approximately 10 mm. Cut M2. Cut M2 on copper wire. Then we screw on the part. We carry out soldering.
Patination
Weight and size
Weight was 24 g. Length 168 mm.
Requirements and differences
People who smoke quickly realized that a cigarette mouthpiece reduces the strength of tobacco, and the taste becomes softer. In addition, the tube retained bitter crumbs, which would certainly end up in the mouth when using rolled-up cigarettes. Moreover, my fingers turned yellow less and my teeth didn’t darken as much.
When the harm of smoking was assessed, it turned out that a cigarette mouthpiece reduces (albeit slightly, but still) the volume and activity of harmful substances inhaled when smoking. It turned out that the smoke, passing through the air corridor, cooled, and some of the resins remained on the walls of the tube. Some devices began to be equipped with filters that further retained harmful substances.
A cigarette holder can be made of various materials. The main thing is that it is indifferent, resistant to temperature, smoke and attractive in appearance.
Today there are many types of mouthpieces (for cigarettes and cigars). They are distinguished by the following parameters:
- concepts (with filter, cooler);
- designs (taking into account length, thickness);
- material (ebony, acrylic, wood, amber, animal bone, Mediterranean briar);
- technologies (handmade, machine-made, stamped).
How to make a smoking pipe with your own hands?
Facts about smoking
Today we will tell you how to make a hand-made pipe at home. If you already smoke, you need to customize this process: cigarettes from a pack and a lighter for three rubles are not a dude’s choice. The pipe is another matter.
I must admit, I smoked a pipe myself – until I quit, of course. It was an interesting matter. Hammering and lighting a pipe is a whole science, we have already told you about this.

My pipe has always been of interest to others: friends asked me to try it, and in public places(for example, in cafes and bars, before smoking was banned there) I always found myself in the very center of attention, as soon as I got comfortable with my pipe.
So, you will need:
- briar (wood);
- ruler;
- chisels for wood carving;
- saw;
- pencil;
- drill with different drill bits;
- compass;
- polishing machine;
- sandpaper;
- cutters – minimum 18 mm;
- time (lots of times);
- idea.
First things first, you need to understand what your pipe should look like. Draw the options on paper and choose the one you like best.
Embodiment
Cut off a piece of wood of the right size - your pipe will be just a little smaller.
Draw an outer circle - the diameter of the tube - and an inner circle - the diameter of the recess in it, where you will stuff the tobacco.
Now we draw the selected shape on the remaining sides of your block. All that’s left to do is to trim the wood so that the idea is embodied in your block (you grab the tools and work). As a result, you will get approximately what is shown in the picture.
Drilling
You need to drill a hole through which the smoke will enter your mouth.
As you can see from the picture, you first need to measure how deep you will have to drill. Caution: the walls of the tobacco chamber should not be thin, otherwise high temperatures They will destroy your pipe.

The wall thickness of the tube shown in the picture is 8 mm. The diameter of the tobacco chamber is 18 mm, the depth is 30 mm. In the end, it is clear that the dimensional characteristics depend on the chosen design.
Now you need to make a hole in the mouthpiece that will connect the mouthpiece to the tobacco chamber. Carefully drill a hole (a 7mm drill was used to make this tube). Then we change it to a smaller drill (in our case, 3 mm). Don’t forget to test - how well does it blow, is the connection between the tobacco chamber and the mouthpiece established?
Rounding it off
The tube should look like a tube, right? Who has seen a cube-shaped tube? This is some kind of cubism.
Grinding
This will require sandpaper and a lot of patience. Sand until you are happy with the texture.
Let's finish
We connect one to the other and make minor adjustments. The tube cannot yet be used. You need to polish it - that's what a polishing machine is for.
To make your own smoking pipe, you will need materials and some tools. Be prepared right away that making a pipe with your own hands will cost you more than buying a ready-made one. And the quality of the first copies is unlikely to be high. But smoking a homemade pipe is much tastier :)
First you need to understand the structure of the smoking pipe:
- Read more about the structure of a smoking pipe »

In this article we will look at the process of making a smoking pipe with different sets of tools.
1. There is no tool at all
In this case, drilling the briar yourself and making a mouthpiece is out of the question. We will use a pre-drilled hobby block and a pre-made acrylic mouthpiece. Both can be bought, for example, on pipeshop.ru. True, hobby blocks are not always available there. You can also search for hobby blocks on eBay.
The diameter of the trunnion (the tenon of the mouthpiece) and the mortise (the hole for the trunnion) must be compatible, therefore it is advisable to buy the mouthpiece and the hobby block from the same seller.
You will still have to buy some minimum tool. Namely - a file and several sheets of sandpaper from the coarsest to 1000 grit.
You will have to sharpen the shape of the tube with a file. Be prepared for the fact that this will take a lot of time. You can roughly cut off the excess material with a hacksaw, but then, in addition to the hacksaw, you will also have to buy a vice.
Drilling machine and band saw
These machines, even the simplest ones, will greatly simplify the work and make it possible to make a tube with your own hands from start to finish, without using ready-made components. I started with just such a kit. I bought them used for only 5,000 rubles in total.
You'll probably have to look for a band saw, but there are plenty of drill bits on sale.
For example, a Corvette 41 drill and a Corvette 31 saw, or any similar ones, are suitable (most machines are made at the same factories in China, and differ only in brand and color).
You will need drills: 3-4 mm for the smoke channel, 7-10 mm for the mortise - 0.1 mm less than the diameter of the purchased trunnion. The first drill may need an extended one - they are not sold in every store. I'll have to look for it.
Plus, you need to resharpen an 18-22mm feather drill to a parabolic shape, then sharpen it. To do this, you will need any, even the simplest sharpening machine (just a sharpening stone on a motor), or someone who has one.
You will also need a Forstner drill. It is also sold as a “furniture hinge drill.” Don't skimp, buy Bosch - this is an important tool, it must be of high quality.
© S. E. Thile
Cut it off band saw a little briar so that the edge is perpendicular to the axis of the smoke channel. If the drill lands on an inclined surface, it may move.

Place the marked block in the vice of a drilling machine so that the tip of the drill hits the drilling point. Check the direction of the drill with the axes drawn on the block on all sides. Remove the regular drill, install a Forstner drill, and use it to level the perpendicular surface. Then put the regular smoke duct drill back in. All this without removing the workpiece from the vice.
Drill at low speeds, removing the drill from the briar from time to time. Otherwise the briar will start to burn.
Drill out the mortise to the required depth. If the mortise axis does not coincide with the axis of the smoke channel, first correct the block with a vice. Remove the block from the vice, making sure everything is drilled correctly.
Insert the drill into the channel, look from all sides to see if it has gone to the side. If it took a little, it doesn’t matter, redraw the axes and slightly change the shape of the planned tube.
Just remember to reapply the tape on the drill bit if the depth of the chamber has changed. Check whether the trunnion fits tightly in the mortise.

When you install the block for drilling the tobacco chamber, it is better to install a thin drill bit (for the smoke channel) in the chuck. It is easier to set the drilling axis using it. And only then, when the block is installed in the vice as it should be, change the drill to a sharpened point drill.
Drill the tobacco chamber to the desired depth. Remove the block from the vice. If the smoke channel does not reach the bottom of the tobacco chamber, drill it manually. It is quite possible to drill a couple of millimeters with your hands, cutting the drill with pressure. Just make sure that it is the channel that is not drilled to the bottom of the chamber, and not vice versa.
Making a mouthpiece
Use a band saw to cut a piece of ebonite to the required length. Set it upright in the drill press and don't remove it until you're done. Use a Forstner drill to make a smooth, perpendicular surface. Then drill a hole for the Teflon pin of the required depth and clean it from dust.
Mix epoxy glue (Poxipol is suitable), pour a little onto the bottom of the hole for the trunnion, and spread it onto the glued part of the trunnion. Insert the pin and press it with a clamp without fanaticism. All this without removing the workpiece from the machine. Wipe off excess epoxy while it is still wet.
Wait until the epoxy hardens completely. This takes longer than what is written on the package. You can check whether enough has passed by looking at the glue residue where you mixed it. Poke around, if the epoxy has hardened into stone there, it means it’s in the workpiece too.

The channel should be conical, so drill it successively deeper and deeper with thinner drills. The thinnest drill bit should be long enough to reach the end.
It is very difficult to drill from the reverse side - you can ruin the workpiece, so it is better to do everything in one installation.
When you reach the end and make sure that the drill comes out from the back of the workpiece, remove it from the machine.
Congratulations! You already have something to smoke :)
But so far it doesn’t look very aesthetically pleasing. Excess briar must be cut off with a band saw, then the briar and ebonite must be sharpened with a file for a long, long time. Try not to wear off the mouthpiece - leave a little “meat” there. The mouthpiece will need to be sharpened later with a flat file.
Grinding and polishing the tube
Mouthpieces for men and women
And now – a little about the details. How is a man's cigarette holder different from a women's? It must be said that this device became an element of sophistication during the introduction of fashion for women smoking (19th century). Rough and thick cigarette holders clearly did not suit elegant and sophisticated ladies with manicured fingers. In addition, the smoke permeated the gloves, leaving an unpleasant odor and yellow stains.
The long cigarette holder was designed to protect against these troubles. And it looked much prettier on a woman’s thin fingers than on a man’s. The cigarette holder for women turned into an accessory for fashionistas of that time. It was made from quite expensive materials - amber, mahogany. Mouthpieces with inlay were especially valued.
With the advent of filter cigarettes, mouthpieces began to fall out of use and remained in use only among a few smokers. Today they are back in fashion. The greatest demand is for cigarette filter mouthpieces. Prices are suitable for any budget: from cheap (from 10 USD for men and from 15-20 USD for women) to quite expensive.
How to make a cigarette holder with your own hands? And why is it needed in principle? For many people, smoking is not only bad habit, but also a whole art. Therefore, it is unthinkable without special devices and accessories. The mouthpiece, which first appeared in the 19th century, is making a comeback in fashion these days. Of course, you can buy this simple device, but if you create it yourself, it will not only turn the process of emitting smoke into a ritual, but will also emphasize the individuality of the owner.
The mouthpiece, from the German mund - “mouth” and stück - “part”, is that part of the cigarette that is in direct contact with the smoker’s mouth. This device was invented when smoking pipes began to be replaced by primitive cigars and hand-rolled cigarettes. The fact is that tobacco was expensive, so its remains were carefully preserved to the last crumb. And the first experimenters came up with the idea of wrapping them in paper.
At the same time, the smoking process was less pleasant. The paper became wet, tobacco particles got into the mouth, and the smoke turned out to be too acrid and bitter. Therefore, a certain Charles Peterson came up with a special small pipe, a cap that was put on a rolled-up cigarette and protected the mouth from getting tobacco.
 Nowadays, mouthpieces no longer fulfill their original purpose, because most cigarettes are equipped with filters. They have turned from a practical device into a stylish accessory. However, they also retain some of the smoke and harmful resins, especially if additional filters are located inside. Another plus is that your fingers don’t get wet. pungent odor, do not turn yellow, you can smoke even with light gloves.
These accessories are made from various materials, ranging from ordinary plastic to precious woods inlaid with stones and fine carvings.
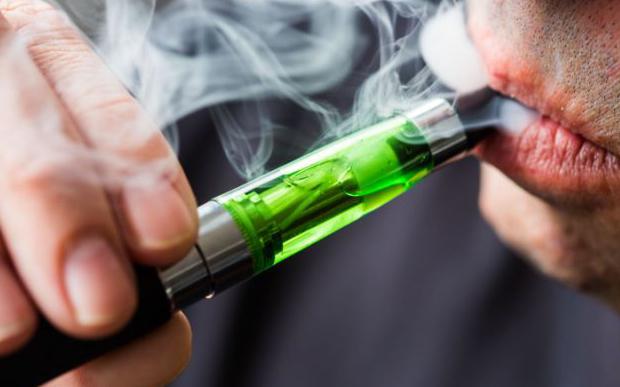
There are different devices for cigars, cigarillos, cigarettes, and also for electronic cigarettes.
Actually, they will differ only in the size and diameter of the hole. In any case, they perform the same function.
We do it ourselves
So, how to make a mouthpiece with your own hands? First you need to decide what you will use it for: for cigars, rolling papers, electronic or regular cigarettes. Its size will depend on this.
Therefore, the most convenient material remains wood, from which such accessories are most often made.
Working with it also requires some skills, the availability of tools and ideas about safety precautions. But, in fact, even a beginner can cope with a tree. True, it’s unlikely that you’ll get a masterpiece the first time, but it’s easy to learn from your own mistakes.
Step-by-step instructions on how to make a cigarette holder from wood with your own hands:
- Selecting the type of wood. It should not be resinous and hard. Birch, willow, etc. work well.
- We cut out a rectangular blank slightly larger in length and width of the finished product.
- Drill a hole of the required diameter from the end of the workpiece.
- We give shape and make it beautiful with sandpaper, a file, a knife and other suitable tools.
That's all. Simple accessories made in this way can be interestingly decorated - by carving, burning, applying an ornament, covering with stain, lightly burning, varnishing, etc. The main thing is that everything is in accordance with your taste. You should also not use substances that are harmful to health for decoration. Create and enjoy the process and the result!
The cigarette holder has come back into fashion. Who invented it? What is a mouthpiece for? How to make it? This will be discussed in the article. So...
What is a mouthpiece?
If we translate the word “mouthpiece” from German, we get two roots: mund (i.e., “mouth”) and stück (“part”). It turns out that we are talking about part of the mouth? Yes. Today it is the part of the cigarette that is called the filter. However, previously the mouthpiece was a hollow thin tube made of wood. A cigarette was inserted into it.
When and by whom was the mouthpiece invented?
Tobacco was brought to Europe in 1496 from the island of Tobago. They only smoked cigars back then. Soon tubes appeared. Tobacco was quite expensive, so the unsmoked remains were crumbled and wrapped in paper. These roll-your-own cigarettes were the prototype of modern cigarettes. They became especially widespread during the First World War (tobacco was included in rations).
In 1865, two emigrant brothers named Capp opened a small pipe shop in Dublin. For ten years, things went calmly and smoothly, until a certain Charles Peterson appeared in the town. Soon he asked to be a partner with his brothers, and things went up: Peterson invented a cigarette holder, which was appreciated at the World Exhibition, noting the invention with a gold medal. Amazingly beautiful products marked “Capp&Peterson” are now sold all over the world. I wonder if Charles Peterson had any idea that an invention that was supposed to only prevent tobacco from getting into the mouth would become so widespread?
Requirements and differences

People who smoke quickly realized that a cigarette mouthpiece reduces the strength of tobacco, and the taste becomes softer. In addition, the tube retained bitter crumbs, which would certainly end up in the mouth when using rolled-up cigarettes. Moreover, my fingers turned yellow less and my teeth didn’t darken as much.
When the harm of smoking was assessed, it turned out that a cigarette mouthpiece reduces (albeit slightly, but still) the volume and activity of harmful substances inhaled when smoking. It turned out that the smoke, passing through the air corridor, cooled, and some of the resins remained on the walls of the tube. Some devices began to be equipped with filters that further retained harmful substances.
A cigarette holder can be made of various materials. The main thing is that it is indifferent, resistant to temperature, smoke and attractive in appearance.
Today there are many types of mouthpieces (for cigarettes and cigars). They are distinguished by the following parameters:
- concepts (with filter, cooler);
- designs (taking into account length, thickness);
- material (ebony, acrylic, wood, amber, animal bone, Mediterranean briar);
- technologies (handmade, machine-made, stamped).

Mouthpieces for men and women
And now - a little about the details. How is a man's cigarette holder different from a women's? It must be said that this device became an element of sophistication during the introduction of fashion for women smoking (19th century). Rough and thick cigarette holders clearly did not suit elegant and sophisticated ladies with manicured fingers. In addition, the smoke permeated the gloves, leaving an unpleasant odor and yellow stains. The long cigarette holder was designed to protect against these troubles. And it looked much prettier on a woman’s thin fingers than on a man’s. The cigarette holder for women turned into an accessory for fashionistas of that time. It was made from quite expensive materials - amber, mahogany. Mouthpieces with inlay were especially valued. Men were more practical by nature. That’s why their mouthpieces were simpler and smaller. Firstly, they were more convenient to store, and secondly, they were not as fragile as women's ones.
With the advent of filter cigarettes, mouthpieces began to fall out of use and remained in use only among a few smokers. Today they are back in fashion. The greatest demand is for mouthpieces with Prices - for any budget: from cheap (from 10 USD for men and from 15-20 USD for women) to quite expensive.
How to make a cigarette holder?

The product usually consists of three parts: a core, a so-called nipple and a tip. Don't try to make a mouthpiece from scrap materials. Sometimes it is advised to remove the “innards” from a pen or felt-tip pen and use a hollow tube. In no case! Firstly, the tip must be conical. To make it you will need bronze. The core can be made of any other material. And for the nipple sleeve, textolite or organizational material is suitable. Holes of the appropriate size are drilled in the parts and then connected. If the ebonite mouthpiece slips out of the shank or stays loose in it, heat the bushing in boiling water and press it onto a hard surface. The diameter will become larger and it will hold much tighter.
Special pastes are used for cleaning. However, not everyone has them. An alternative option is tooth powder. If you have trouble finding it on sale, squeeze a little toothpaste onto a plate and wait until it dries, then grind it into a powder.
Now many smokers are beginning to think about their health, many are quitting this habit, while others are switching from cigarettes to regular tobacco, which contains much less impurities. However, it requires a tube. The retail chain offers a wide selection of them, but really high-quality copies are very expensive. And now we will discuss how to make a smoking pipe yourself.
Material for making a smoking pipe
Masters make smoking pipes from briar. It is a growth at the root of a tree called heather. It is ideal for creating such a specific product. After all, heather grows in the rocky soil of the Mediterranean climate, and briar absorbs moisture and minerals, which subsequently give all the necessary qualities to the tree, which is so valued by the craftsmen who make smoking pipes from it.
Local tree species to create a smoking pipe
However, this tree does not grow in our area, and if you buy it, it will not be cheap. You can do it yourself, materials for which can easily be found in local gardens. Fruit trees with dense wood are suitable for making a pipe: apple, pear, plum. But it is best to choose cherry; its fibers are the densest of the listed species, so it will not burn out for a long time. All the others are also good, but they char a little faster. It is advisable to use the root part for harvesting, but branch or stem material is suitable. Fruit trees They have a great flavor when smoked. Some people like the taste of cherry, others like apple, it all depends on your own preferences. This is also why it is better to make a smoking pipe with your own hands.

Preparation of material
Having decided on the type of wood, you also need to find out how to properly dry a suitable piece. You cannot cut a living branch or part of a root and immediately make a tube out of it. The cuts on the material are painted over or sealed so that moisture cannot quickly evaporate through them. It should gradually come out through the bark, which in no case should be removed immediately. And so the tree should lie until next year - then the fibers will gradually dry out, and there will be no cracks in their structure. And only after this time will it be possible to remove the bark and grind out the shape of the smoking pipe.
You can also make a smoking pipe from a dried log. To do this, you need to cut the workpiece from its center. Of course, if it was in a dry place. The extreme places with cracks are cut off, after which there is solid wood that has no flaws. After this, the bark is removed and the required size of the workpiece is cut out, but with a margin of five centimeters. Then the wood is put aside for a week, because it must completely dry out, after which microcracks may well appear. If you immediately start grinding out the shape of the smoking pipe, then the revealed flaws will ruin everything. And after a week, even if small cracks open, they will be in the remaining stock, and after cutting it off there will be an ideal surface for carving.

Manufacturing process
To begin, cut out a simple angular blank resembling a square or diamond. Its surface must be sanded in order to clearly see the structure of the wood and determine whether there are any defects on it. If everything is good, we mark it future form in more detail, to know where the smoking chamber will be, and where the shank is - this is the part where the mouthpiece is attached. You need to mark all the details and holes with a pencil. It is also worth drawing directions to make it easier to maintain angles when drilling.
When making smoking pipes with their own hands, craftsmen first drill a hole for the chamber into which tobacco will be poured. First, you should do this with a thin drill, and then select a thicker one until the hole reaches the desired diameter. But you shouldn’t immediately bring it to the final size; you need to leave an allowance of a few millimeters and then sand it with sandpaper. After all, the drill leaves an uneven surface, but it should be smooth.
After this, a smoke channel hole is drilled on the side in the place where the chibouk is intended. This must be done carefully, because making smoking pipes with your own hands is a very precise and labor-intensive process. The hole for smoke exhaust must be strictly at the bottom of the tobacco chamber. This is very important point, because if you make it a little higher, the tobacco inside will not burn out completely, which can lead to souring, and this will worsen the taste of the pipe and smoke. This channel can be from 3 to 4 mm. The wider it is, the drier the tube will be. By the way, it is better to equip it with a filter to prevent ash from getting into the middle. In addition, the wide smoke channel makes it easy to clean the pipe with a brush. Once the holes are ready and accurately connected, you can begin to create the external shape.
Of course, it is better to make smoking pipes with your own hands on a machine; it will be much easier and faster. But if you don’t have such equipment, you can still make a good copy by hand.
Next (when working on a machine) you need to make circles that are possible; all other parts are cut out by hand with a well-sharpened cutter. It is important to make the edge of the motiz narrower than the entire width of the shank. This is necessary so that the mouthpiece can be put on and the two parts are on the same plane. After this, the surface is sanded outside and inside with sandpaper. First, the large one removes all the bumps left by the knife, and then the fine one removes scratches from a flat surface. However, you can leave the outer parts unprocessed - here everything is done to the taste of the master.

Choosing a mouthpiece material
We continue to talk about how to make a smoking pipe, and now we will create a mouthpiece. It can be made of ebonite or acrylic. The first material is softer, but polishing remains on it for a very short time. It is better to choose it for those who hold the pipe in their teeth when smoking. Acrylic is harder and more durable, and therefore it is suitable for holding the product in your hands during the process.
Manufacturing process
You need to take a stick of ebonite or acrylic with a length of 10 to 15 cm. To ensure that the smoke has time to cool when smoking, make your own smoking pipes no shorter than 10 cm. Taking this into account, we choose the size of the mouthpiece. A hole is made in it along the entire length with a drill, the diameter of which is 3 mm. They start from the part where there will be a connection with the chibouk. After this, the hole is expanded by half the length to the diameter of the smoke channel. Then this step that forms needs to be smoothed out. To do this, you need to cut a triangular tip on a wire with a diameter of 4 mm. It needs to be pushed in all the way and carefully turned several times.
After this, the channel is sanded using a thin wire with sandpaper glued to it. The place where the mouthpiece will be is expanded horizontally to create an oval of 5-6 mm. This will make it easier for the smoker to absorb the smoke. On the other hand, the hole in the mouthpiece is widened so that it fits tightly onto the shank, but without much effort.

External molding of the mouthpiece
Mouthpieces, like smoking pipes, are processed with your own hands. You can grind it on a machine or use improvised tools. The form is also arbitrary. After this, you need to sand the surface first with fine sandpaper, and then with felt with GOI paste. If you make an ebonite mouthpiece, you can bend it and give it a different shape. To do this, it is heated over a gas stove or candle and then bent.
Do-it-yourself wooden smoking pipes can be waxed or etched - this way their surface will look elite, and will be much clearer and, of course, this is an excellent protection for the surface of the wood.
Tube etching
An excellent mordant can be potassium dichromium, ground in water, and after the reaction with the release of gases stops, this indicates that the mixture is ready for etching the wood. The more concentrated it is, the richer the color and contrast of the wood fiber pattern. The tube is immersed in the composition until it reaches the desired tone. You can store this mordant as long as you like in an airtight glass container.
Waxing
There is a great and simple way. Wax required. 100 g of it needs to be finely chopped, then add mastic (12 g), instead of it you can crushed rosin (25 g). The selected mixture is put on fire until everything becomes liquid. Then remove it from it and immediately pour in 50 g of warm turpentine. After this, the mixture must be thoroughly stirred and poured into the required container. The composition is stored in it until it is needed to be used. Take the mixture, apply it to wool or cotton fabric and thoroughly rub it into the wood.

Cleaning a smoking pipe
This should be done when the tube has completely cooled down. You must carefully disconnect the mouthpiece by unscrewing it clockwise. If you pull it out using extraordinary force, you can damage both parts of the tube. The mouthpiece is cleaned with special brushes, starting from the side of the mouthpiece. It is better to have several of them for a more convenient process.
It is necessary to clean the chibouk after each smoking session. The brush is started from the side where the mouthpiece was. After everything is cleaned, the brush is left inside the pipe until it is time to fill the pipe with tobacco. Cleaning of the product is completed by wiping all its external surfaces. The tube is then purged to remove any carbon or debris that may have remained inside.
For general cleaning of the tube, wax, alcohol, and various other liquids are used; it is carried out as it becomes dirty. And only the owner himself knows when simple maintenance is not enough.
Nowadays a pipe is more of a decorative element; it is rarely smoked because it needs to be looked after. Now they are like fine wine, which is only savored from time to time. There are also many accessories for such a delicacy (stands for smoking pipes, for example), which can be different forms and sizes.
How do the most expensive and collectible pipes differ from ordinary ones?

First of all, this is an ideal material - briar. In the most expensive collectible pieces, the fibers of this wonderful tree are visible, woven randomly, but the master presents them as if they were grown specifically for this smoking pipe. They, like rays that envelop the smoking chamber, pass into the chibouk. Such a piece of art as a collectible smoking pipe always receives rave reviews not only from knowledgeable people, but also from ordinary people. After all, a masterpiece always has a special aura and, of course, appearance. And looking at it, you cannot catch yourself thinking that you can change its shape or appearance. This is precisely where the master’s talent lies.
