Sweet tooth, candy recipes with photos - for you! Today, almost everyone prefers to buy ready-made sweets in supermarkets and rarely prepare them, but in vain - after all, homemade ones are much tastier. These 8 homemade candy recipes will help you make candy at home that will outshine any store-bought candy in taste. In addition, making sweets at home is not as complicated a procedure as it might seem at first glance. Therefore, we read recipes and prepare sweets with our own hands!
Rum pyramids with raisins
Ingredients:
– 250 g biscuit or shortbread cookies
– 400 g condensed milk
– 165 g raisins
– 125 ml rum
– 2 tbsp. heaped spoons of cocoa powder
– Coconut flakes for sprinkling
Preparation:
Soak raisins in rum overnight. Combine finely crushed cookies, soaked raisins, condensed milk and cocoa in a large bowl. Cool the mixture for 2 hours. Make small pyramids from the mixture (or balls as an option) and sprinkle them with coconut flakes. Refrigerate for 30 minutes to 1 hour.
Candies with dried apricots and nuts

Ingredients:
– dried apricots - 5 pcs.
– walnut - 5 pcs.
– honey - 1/2 tbsp. l.
– milk - 1 tbsp. l.
– dark chocolate - 70-90 g
– cocoa, sesame seeds - for decoration
Preparation:
Finely break the dark chocolate and melt with milk (in the microwave or in a water bath), finely chop the dried apricots and nuts (can be chopped in a blender), mix the melted chocolate, nuts, dried apricots and honey, and cool. Roll small balls from the resulting mass, cool again, roll in cocoa and sesame seeds.
Prunes with walnuts and cognac

Ingredients:
– 100 g dark chocolate
– 10 prunes
– 5 walnut kernels
– 200 ml cognac
– 1 tbsp. spoon of butter
Preparation:
Rinse the prunes and soak overnight in cognac. Stuff prunes with walnut kernel halves. Melt the chocolate in a water bath or in the microwave, add softened butter, mix until smooth.
Dip the prunes in chocolate, place on oiled parchment paper and refrigerate for 2 hours. Another option: pour a little chocolate into the bottom of 10 candy molds (you can use larger molds for edible ice or plastic backings from sweets in boxes), then put the stuffed prunes and pour the remaining chocolate over them. Place in the refrigerator until completely frozen.
Chocolates with figs

Ingredients:
– dried figs - 200-250 g
– chocolate (bar)
– butter 1 tbsp. l.
- walnuts
- cocoa
Preparation:
Soak the figs briefly in boiling water, then cool (you can dry them with a paper towel). Melt chocolate (preferably dark) in a water bath (or in the microwave), you can add a little butter. We make a cross cut on the bottom of the fig and stuff it with coarsely ground walnuts, shape it into truffles (the fig is soft and manageable in the hands), then dip it in warm chocolate, carefully remove it, and place it on the wire rack. When the chocolate begins to gradually harden, you can roll it in cocoa and decorate with a nut. Then place in the refrigerator for several hours.
Vanilla-chocolate fudge

Ingredients:
– 1 can (350–400 g) condensed milk
– 2 teaspoons vanilla extract
– 700 g chocolate
– 425 g marshmallows
– 900 g sugar
– 220 g chopped nuts, optional
– 4 tbsp. tablespoons unsalted butter
– 1/8 teaspoon salt
Preparation:
Grease or grease a square or rectangular pan and set aside. Combine sugar, butter, salt and condensed milk in a tall, heavy-bottomed saucepan over medium heat. Allow the mixture to simmer for 6-7 minutes, stirring constantly. Turn off the fire.
Combine vanilla, chopped chocolate, marshmallows and optional chopped nuts in a large bowl. Add the hot mixture and whisk until all the chocolate has melted. Pour the fondant into the previously prepared mold, carefully level the mass with a wooden or silicone spatula. Place the fudge in the refrigerator for 3 hours. Then remove and cut into small squares.
Milk toffee

Ingredients:
– 200 ml milk
– 200 g powdered sugar or sugar
– 30 g butter
– 2 tbsp. spoons of honey
- Vegetable oil
Preparation:
Pour milk into a thick-bottomed saucepan, add butter, powdered sugar, honey, and turn on moderate heat. Heat the mixture for about 20 minutes, stirring constantly until it thickens and acquires a caramel-cream color.
Distribute the mixture into small shaped molds, pre-greased. vegetable oil, or on a baking sheet lined with oiled parchment paper. Allow the mixture to cool. Then remove the candies from the molds or cut them if they were cooled on a baking sheet in a single layer.
Candies with dried fruits

Ingredients:
– 200 g dried apricots;
– 200 g raisins;
– 200 g dates;
– 200 g roasted almonds;
– juice of half a lemon;
– 1 tbsp. l. honey;
- a pinch of salt;
– sesame.
Preparation:
Pass dried fruits through a meat grinder. Grind almonds in a blender. Add the juice of half a lemon, a tablespoon of honey, a pinch of salt, mix everything, form into balls and roll them in sesame seeds. Roll with your hands again. All.
Turkish delight Citrus boom

Ingredients:
– 5 glasses of sugar
– 2 glasses of water
– 1/2 cup starch
– Zest of 1 orange or lemon
– 2–3 drops lemon or orange oil
– 4–5 tbsp. spoons of powdered sugar
Preparation:
Dilute the starch with 1 glass of cold water and stir well so that there are no lumps. Pour sugar into a saucepan with the remaining water, stirring, bring to a boil and cook over medium heat for 15–20 minutes.
When sugar syrup starts to boil strongly, pour in the starch solution, reduce the heat, add finely grated zest and, stirring continuously, cook until the mixture thickens.
When the Turkish delight comes away from the sides of the dish, add citrus oil, mix again and place the mixture on a baking sheet lined with parchment paper. Flatten the Turkish delight with a spoon dipped in cold water, and let it cool for 4-5 hours. Cut the Turkish delight into small cubes and roll in powdered sugar.
Candies- This confectionery made with sugar or chocolate. They can contain a wide variety of fillings: jelly, creme brulee, liqueur, nuts, jam, fudge, condensed milk, dried fruits and many others.
As for the types of sweets, there are many of them and it is not even possible to simply list them. All of them are quite accessible. By visiting the confectionery department, you can purchase almost any type of sweets. However, the dishonest attitude of manufacturers towards their products encourages them to prepare such desserts themselves at home.
But how difficult is it to make candy with your own hands? It is impossible to give a definite answer to this question. Some candies are quite simple to prepare, while others, on the contrary, require complex manipulations and enormous amounts of time and effort. So if you decide to make your own sweets at home, then, first of all, you need to study the specifics of the recipe for creating them. Only by assessing the complexity of a particular recipe can you decide on the advisability of preparing it.
The advantage of making homemade sweets is that you can avoid the use of harmful food additives, which abound in “factory-made” versions of your favorite dessert. Making your own sweets will be especially important for those who have children, as well as for allergy sufferers, because homemade sweets are not as harmful as store-bought ones, and in most cases are even useful.
How to make candy with your own hands? There is simply no general technology for preparing such delicacies, because they are all individual. Each type of candy requires not only its own set of ingredients, but also its own specific procedures. However, still some general recommendations still exist.
So, for example, in the case of making chocolates, you need to be able to work correctly with the main ingredient - chocolate. Often recipes suggest melting it, without always specifying exactly how to do it. Meanwhile, Only properly melted chocolate will turn out tasty and attractive after hardening..
It is best to melt chocolate in a water bath. It should be brought to a temperature of fifty degrees, no more. But the melted treat should be stored at a lower temperature from 28 to 32 degrees. You can also use a microwave oven for melting purposes, but this must be done strictly as recommended in the recipe, otherwise the chocolate may overheat.
Chocolate that has been subjected to too much melting high temperatures, after hardening it will be dull, in addition, it may appear white coating. A shiny, glossy surface on candies can only be achieved by using the above-mentioned chocolate melting technology.
When making sweets with your own hands, it is also important to protect the molds for them and the melted chocolate itself from the slightest moisture, since it causes this sweet product to crystallize.
As for the filling for homemade chocolates, it can be very varied. The simplest and useful options- These are nuts and dried fruits. It is best to pre-roast the nuts, because they are not as tasty in their raw form. But dried fruits must be washed drinking water and, remembering the negative interaction of chocolate with moisture, dry thoroughly. The preparation of other filling options can be studied in the corresponding recipes. 
A fairly popular type of candy among those with a sweet tooth is caramel. It can also be prepared at home. To do this, you just need to melt sugar (preferably brown cane) in a thick-bottomed cast iron or aluminum pan until liquid. Then the resulting mass is poured into molds and left until it hardens. This is a classic version of making sugar caramel. It can be prepared in other ways with the addition of certain ingredients. However, this issue can also be studied in more detail in the corresponding step-by-step photo recipes on this site.
What candies can you make at home?
When you decide to make sweets at home, as a rule, the question always arises - what kind of sweets can you make with your own hands? The answer is very simple. Any! There are thousands of recipes for preparing these delicacies. Among them are all kinds of jelly and chocolate candies, fudge, pralines, truffles, roasted cakes, a variety of bars, as well as caramel and candies. This list is far from exhaustive, as you can see by studying this section site and its step by step photos recipes for making sweets.
When starting to prepare any sweets with your own hands, be sure to make sure you have necessary ingredients. There will be no time to run to the store while cooking! And, of course, be sure to read all the instructions for the selected recipe photo. Then soon you will be able to please your household delicious treats, prepared with your own hands.
Chocolates are rightfully considered favorite delicacy adults and children. Today, store shelves are lined with various desserts, but they are all packed with flavor stabilizers and emulsifiers. Experienced housewives prefer to make chocolates on their own, and this is not surprising. In the end you will receive completely natural product, which will appeal to all family members. Let's look at the most delicious recipes.
Features of making chocolate
- First of all, it’s worth remembering that chocolate, in all its variety, does not like water. For this reason, it is recommended to be extremely careful when preparing chocolate-based candies. Make sure that the dishes are always dry. When heating the product in a water bath, liquid from the pan should not get into the bowl of chocolate. If water gets into the composition, the candies will curl into lumps, and the base itself will be too thick.
- Milk chocolate thickens much faster than white or dark chocolate. Therefore, it is easiest to prepare candy from the last two ingredients; this will help you control the consistency and choose the required form. The milk mass is overly sensitive to various factors, be it temperature changes or high humidity.
- If you plan to prepare the truffle at home, keep the filling in the refrigerator first. After shaping the candies, also place them in the chamber to allow the finished product to dry after enrobing.
Truffles
- powdered sugar - 45 gr.
- dark chocolate - 225 gr.
- heavy cream (15-20%) - 65 gr.
- cognac - 30 ml.
- hazelnuts - 45 gr.
- cocoa powder - 85 gr.
- Select a small enamel pan, wash and dry it. Even one drop of water can ruin the consistency of the finished product. Break the chocolate into small cubes, place it in a container, and place the dish on the stove. Stir constantly so that the mixture does not stick to the walls.
- In a separate bowl, combine powdered sugar and cream, stir until smooth. Place the container on the stove and heat it up too. Pour into the chocolate base in a thin stream and stir with a wooden spatula.
- Fry the hazelnuts in a dry frying pan without vegetable oil. Chop it into small pieces, mix with cognac and add to the previous mixture. Stir again and refrigerate for 1.5-2 hours.
- After the specified period, you will receive a composition that resembles plasticine in consistency. Form circles from the mixture and roll them in cocoa powder. Place the finished truffles on a tray or cutting board and leave in the refrigerator for 1 hour.
Candies with walnuts
- walnuts (kernels) - 55 gr.
- dark chocolate - 25 gr.
- honey - 20 gr.
- Fry the walnuts in a dry frying pan, grind them in a coffee grinder or blender. Mix the shavings with honey and form into circles.
- Break the chocolate into small squares, place in a saucepan and melt in a water bath. Dip the finished balls into the melted mixture and place on a tray.
- Place the finished candies in the refrigerator until completely hardened. Typically they will harden within 2 hours. You can replace walnuts with almonds or hazelnuts.

- cream (fat content 20%) - 110 gr.
- butter - 55 gr.
- vegetable oil - 10 ml.
- dark chocolate - 45 gr.
- toffee candies - 210 gr.
- hazelnuts - 45 gr.
- Remove the butter from the refrigerator and leave it at room temperature. Place the iris in a deep bowl and melt in a water bath. After this, mash the liquid mixture with cream and butter using a fork or blender.
- Heat a frying pan, place the hazelnuts on it and fry well. Peel the nuts, prepare a mold for candy and grease it with vegetable oil.
- Place one whole hazelnut in each section and top with melted toffee mixture. Place the workpiece in the refrigerator and wait a quarter of an hour.
- Break the chocolate into small squares, melt in a water or steam bath, stirring constantly. Take out the toffee candies, fill them with chocolate glaze, and put the delicacy in the freezer.
- After about 6 hours, the candies will harden, all you have to do is take them out and place them in an airtight container. The shelf life of toffee “Toffee” is 10 days.
Sweets with condensed milk
- cocoa powder - 25 gr.
- white chocolate - 55 gr.
- butter - 15 gr.
- condensed milk - 410 gr.
- Remove the butter from the refrigerator, chop it into small cubes, and place in a deep bowl. Melt the mixture until room temperature, then add cocoa powder and pour in milk (fat content from 3%).
- Prepare water bath, melt the mixture to a liquid consistency. Simmer the mixture for no longer than 10 minutes, otherwise the cocoa will lose its aroma.
- Turn off the stove, cool the mixture first at natural conditions, then put it in the refrigerator for half an hour. At this time, grind the white chocolate on a grater and pour it into a flat dish.
- Remove the creamy mixture from the refrigerator and roll it into balls. Roll the resulting candies in grated white chocolate and place on a tray. Refrigerate the treat for 1 hour.

- granulated sugar - 55 gr.
- milk chocolate - 75 gr.
- hazelnuts - 90 gr.
- butter - 25 gr.
- First of all, place the hazelnuts in a dry frying pan and fry them until Brown. Grind in a coffee grinder or chop into pieces.
- Pour granulated sugar into a thick-bottomed pan and melt it on the stove. Make sure that the composition does not burn; collect the mass from the walls of the container.
- After you boil the sugar syrup, add chopped hazelnuts to it. Place the finished mixture on parchment paper and cool.
- Once the mixture has hardened and cooled, transfer it to a blender and puree. Next, add the butter, previously melted at room temperature, and beat the mixture. Start slowly adding sugar syrup with nuts.
- You will end up with a thick paste, form it into cubes or circles. If desired, add one whole hazelnut to each candy. Place the finished candies in the refrigerator for a quarter of an hour.
- Melt the chocolate in a water bath and dip the formed candies into it. Place the dessert on a tray and refrigerate until completely frozen.
Candies with Mascarpone
- soft cheese (Mascarpone is suitable) - 145 gr.
- milk chocolate - 85 gr.
- dark chocolate - 90 gr.
- Prepare paper or silicone molds for candies in advance; they should not be big size. Melt the dark chocolate in a water bath or in the microwave (Defrost mode, 15 minutes).
- Grease the sides of the molds with chocolate glaze and place them in the refrigerator for 25 minutes. After this period, grease the molds with chocolate again and place them in the cold again for half an hour.
- While the base is hardening, break the milk chocolate into squares, place in a container and melt in a water bath until smooth. Cool for 7 minutes, add soft cheese.
- Beat the mixture with a mixer or blender, remove the molds from the refrigerator. Try to separate the frozen chocolate from the sides so that you get molds with sides.
- Pour the resulting mixture of cheese and milk chocolate into a pastry bag. Click on it to fill the chocolate molds. Place the candies on a tray and refrigerate for 1 hour. Shelf life - 5 days.

- peanuts without salt - 50 gr.
- hazelnuts - 60 gr.
- fat sour cream - 100 gr.
- cocoa powder - 55 gr.
- granulated sugar - 55 gr.
- butter - 45 gr.
- white chocolate - 80 gr.
- coconut flakes - 30 gr.
- If you wish, you can replace peanuts or hazelnuts with other types of nuts, for example, cashews, walnuts, pistachios. Heat a non-stick frying pan, add peanuts and hazelnuts, fry until brown.
- When the shell begins to separate, remove the product from the heat and peel. Grind it in a blender until it becomes flour or chop it into pieces with a knife.
- Remove the butter from the refrigerator, cut it into small cubes, and melt it in a water bath. Gradually add cocoa, after sifting the powder.
- Continuing to stir the mass, add granulated sugar and bring the mixture until the granules are completely dissolved. Remove the mixture from the heat, cool to room temperature, add sour cream.
- Pour the mixture into a blender or beat with a mixer, add nuts, and place in the refrigerator for 1 hour. At this time, melt the white chocolate in a water bath and pour the coconut flakes into a flat dish.
- Take out the creamy mixture, roll it into balls, and roll in melted white chocolate. Then immediately sprinkle with coconut and place on a tray. Refrigerate until completely set (about 3 hours).
Candies with almonds
- powdered sugar - 80 gr.
- butter (60-72%) - 110 gr.
- cocoa powder - 80 gr.
- almonds - 60 gr.
- Cut the butter into cubes, place in a saucepan, place on the stove and melt in a water bath. Sift the cocoa, start adding the powder one teaspoon at a time, stirring at the same time. Do the same with powdered sugar.
- As a result, you should get a creamy mass. Remove the product from the stove when the mixture becomes homogeneous. Cool to room temperature, then place in the refrigerator for half an hour.
- When the specified time has elapsed, form the mixture into balls, placing one roasted almond inside. Sprinkle the candies with powdered sugar mixed with cocoa powder in equal proportions.
Candies with boiled condensed milk
- walnut - 150 gr.
- wheat flour - 40 gr.
- condensed milk - 300 gr.
- cocoa powder - 85 gr.
- jam berries (whole) - for decoration
- Remove the label from a can of condensed milk. Place it in a saucepan and pour boiling water over it so that the water completely covers the container. Cook over moderate heat for 2.5 hours, then turn off the burner and cool the mixture.
- When the condensed milk has cooled to room temperature, uncork the jar and place the contents into a deep bowl. Sift cocoa through a kitchen sieve and mix with condensed milk.
- Line a baking sheet with parchment paper or food foil and sprinkle wheat flour. Take two teaspoons, scoop up the mixture with the first one, remove the mixture with the second, placing it on a baking sheet. The distance between candies should be at least 3 cm.
- Place one berry at a time on top of the mixture. Preheat the oven to 180 degrees, adjust the power so that it does not fluctuate. Place the baking sheet inside and bake the product for a quarter of an hour.
- When the specified period has passed, turn off the oven, remove the baking sheet and cool the contents to room temperature. Carefully lift each candy with a spatula, place on a tray and place in the refrigerator for 1 hour.
Candies with dried fruits
- sweet almonds - 90 gr.
- dried apricots - 110 gr.
- seedless raisins - 80 gr.
- dried figs - 120 gr.
- lemon - 1.5 pcs.
- honey - 210 gr.
- walnut - 100 gr.
- cocoa - 115 gr.
- milk chocolate - 100 gr.
- Fry almonds and walnuts in a hot dry frying pan, peel and grind in a blender/coffee grinder. Combine raisins, dried apricots, lemons, and figs. Place dried fruits in a meat grinder and rotate 2 times.
- Mix the two masses into one composition, add honey and mix well. Place the mixture in the refrigerator for half an hour, then apply cocoa powder to your hands and begin to form balls.
- When the candies are ready, roll them in cocoa again. Melt the chocolate in a water bath, bring until smooth, cool. Dip the finished products into the mixture and place them on a flat dish.
- Place the candies in the refrigerator. When the chocolate sets into a crust, start eating. The shelf life of homemade sweets is 10-14 days.

- coconut - 0.5 pcs.
- white chocolate - 100 gr.
- powdered sugar - 55 gr.
- butter - 110 gr.
- cocoa - 80 gr.
- almonds - 175 gr.
- Cut the butter into small cubes and melt in a water bath. Slowly start adding powdered sugar while stirring the product.
- Remove the mixture from the heat and add the sifted cocoa powder. Beat the mixture with a mixer and place in the refrigerator for 45-60 minutes.
- At this time, peel the coconut and grate half the fruit on a fine grater. Fry the resulting chips in a dry, hot frying pan for 1 minute. Place it in a flat dish.
- Remove the creamy mixture from the cold, form small balls, and place pre-roasted almonds inside. Melt the chocolate in a water bath, let cool.
- Alternately dip the candy first into the chocolate glaze, then sprinkle with coconut flakes and press lightly with your hands. Place the finished candies on a cutting board.
- At the end of all manipulations, place the finished product in the cold for 1.5 hours. Serve with unsweetened coffee or tea. Store no longer than 5 days.
Candies with caramel
- butter - 30 gr.
- cereals- 90 gr.
- granulated sugar (brown) - 50 gr.
- hazelnut (whole) - 110 gr.
- dark chocolate - 90 gr.
- white chocolate (milk is possible) - 100 gr.
- Prepare silicone or paper candy molds. Melt the dark chocolate in a water bath, then cool and pour into the compartments of the mold. Leave to set in the refrigerator for 15 minutes.
- Chop the butter into cubes and leave at room temperature until softened. Add granulated sugar and mash the mixture with a fork. If the granules do not dissolve, use a water bath.
- Grind the oatmeal in a coffee grinder or blender and add to the previous mixture. Fry the hazelnuts in a dry frying pan, chop them into small pieces with a knife, and add them to the creamy oatmeal mixture.
- Pour the mixture into an enamel pan, put it on the fire and melt until completely caramelized. You will feel a characteristic smell, the mass will turn brownish.
- Remove the chocolate molds from the refrigerator and pour the cooled mixture into them. Melt white chocolate in a steam bath and pour it over the base.
- Place the mold in the refrigerator for 3 hours. After this, you can wrap each candy in foil and decorate with ribbon. Store no longer than a week.
The shelf life of homemade chocolates is quite short, this is due to the completely natural composition and the absence of preservatives. Storage in the refrigerator is limited to two weeks, in other conditions - 6-7 days.
Video: Bounty chocolates
We all love sweets to one degree or another. Some people simply cannot imagine their life without sweets; for others, a couple of pieces with tea or champagne are enough. And if vegetarians do not know the taste of meat, some people will never try goose liver or mussel meat in their entire lives, then every person living in modern world On the Earth. To say that the stores have a large selection of sweets is to say nothing. It is huge, for every taste, color, and wallet.
But what’s also interesting is that some of the most experienced and best housewives, who skillfully create delicious salads, complex cakes or amazing hot dishes in their kitchens, have never tried to make ordinary sweets at home. Not because it is difficult or because some ingredients cannot be found, and not because there is not enough time or some special equipment is needed. This is all for the simple reason that you can go and buy candy in the store at any time. And although sometimes we are not always sure of the quality, naturalness, and freshness of purchased delicacies, we continue to do so.
Maybe it's worth a try? Don't know where to start and how to decide? Let's do this together. Here you will find the best and delicious options homemade homemade sweets. Believe me, your household and guests whom you treat with your creation will not remain indifferent.
Recipe No. 1. Sweets "Lady Night"
Many of you have probably tried very tasty candies with prunes and dried apricots called “Lady Night”. We suggest you make these candies yourself. To say that you will be delighted with the result is an understatement! Homemade sweets are incredibly tasty, much better than factory-made ones! Treat yourself and your loved ones to this amazing delicacy!The candies come out a little larger than the original ones.
Ingredients for 8 candies:
- prunes – 16-20 pieces;
- dried apricots – 16-20 pieces;
- walnuts - a large handful with a slide;
- dark chocolate – 100-150 g;
- marshmallows - several pieces (depending on size).

How to make delicious homemade sweets
Dried apricots and prunes are first thoroughly washed, scalded (it is advisable to keep the dried apricots in boiling water to soften them), and dried in the open air.
Dried apricots are chopped with a knife to make it easier to grind them into pulp with a blender. 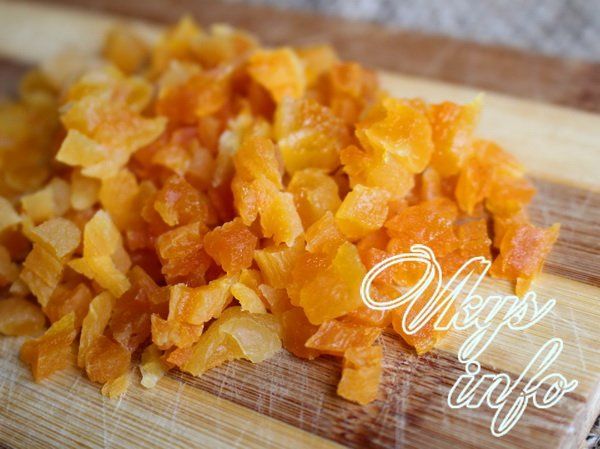
Prunes are chopped with a knife for the same purpose as dried apricots. 
The nuts are chopped with a knife or crushed with a masher. 
Add half the nuts to the dried apricots, grind them all together in a blender into a paste. If the dried apricots are too harsh, then add a tablespoon of warm boiled water to the pulp to obtain a more homogeneous mass. 
The prunes are mixed with the remaining half of the nuts and also ground in a blender into a paste. 
Next, the candies are formed. To do this, wet your hands in warm water(so that the mass does not stick to your hands), pinch off pieces from the first mixture (dried apricots + nuts), place them in the middle of each marshmallow and form the candies in the shape of balls or ellipses so that the marshmallow is inside.
There are marshmallows different sizes, for sweets it is better to take about 1.5 by 2 cm or a little more. 
These are the kind of sweets you get. 
The same is done with the second mixture (prunes + nuts). 
Melt the chocolate in a water bath (65 degrees). 
Each candy is dipped into chocolate using a fork or a pair of chopsticks. 
Place on a board covered with cling film or parchment and place in the refrigerator for an hour. Homemade sweets are ready! 
You can decorate them by sprinkling chocolate or coconut shavings on top. 
If you use milk chocolate instead of dark chocolate, you will have to wait about 2 hours, as it takes longer to harden. 

Teaser network
Recipe No. 2. Candy "Toffee"
Sometimes it’s hard to believe that some confectionery products can be easily reproduced at home, especially expensive sweets that we only allow ourselves to buy on holidays. But have you noticed that many “luxury” candies in attractive packaging consist of the most ordinary ingredients that are harmoniously combined with each other? Here it is, the highlight - the manufacturers just found a successful combination of components and created an attractive aesthetic appearance of the product itself. For example, the well-known and beloved Toffee candies - a delicious delicacy in a beautiful package consists of just creamy toffee filled with hazelnut kernels and drizzled with a small amount of dark chocolate! It would seem, what's special here? But admit it, it’s really tasty and beautiful! Do you want to make this masterpiece with your own hands? Then let's get started! 
Ingredients for 15 candies:
- creamy toffee – 125 g;
- hazelnuts – 15 pieces;
- dark chocolate – 30-50 g;
- sour cream or heavy cream (thick) - 3 tablespoons;
- butter – 20 g.

Preparation:
Melt the toffee and butter in a water bath or in a ceramic frying pan over very low heat. 
When the toffee begins to melt, add sour cream (cream). 
Stir the mixture until a homogeneous caramel is obtained. 
Be sure to grease the molds with butter. If you have silicone molds for candies, then you can immediately pour hot caramel into them; if you don’t have any, then you can use a plastic insert from under a box of chocolates. To prevent the plastic from melting, you need to wait until the mass has cooled to the temperature where you can pick it up with your hands. After cooling, warm caramel is plastic, you can easily roll it into small balls and press them into molds. Press a hazelnut kernel into each candy. 
Melt dark chocolate in a water bath (65 degrees).

Pour the chocolate over the nut so that it covers only the kernel of the nut, and not the entire surface of the candy.

Place the chocolate in the refrigerator for an hour (you can place it for 10-15 minutes in freezer, then it will be easy to remove them from the mold without damaging the shape of the candies).


That's all, all that remains is to carefully remove the wonderful and healthy candies from the molds and transfer them to a beautiful dish.
Recipe No. 3. Nut candies in tartlets
What should we do... prepare some sweets? Let's cook it and eat it. This recipe is actually easy to follow and the results are quick to eat. So, let's not deny ourselves the pleasure. 
Ingredients:
- ready-made tartlets – 30 pieces;
- mixture of nuts (cashews, hazelnuts, peanuts) – 100 g;
- cocoa powder – 2 tablespoons;
- granulated sugar – 2 tablespoons;
- fat sour cream – 2 tablespoons;
- butter – 2 tablespoons.
How to make candy at home
It is convenient to measure all the ingredients directly into the cezve, which must be placed on the minimum heat of the burner. Stirring the contents of the Turk from time to time, bring the mixture until thick and homogeneous and the sugar is completely dissolved. 
Having placed the tartlets on a flat dish, you need to fill each of them with nuts. Of course, in this recipe you can only take some certain type nuts, your favorite, but when they are different it gives the taste a little intrigue. The nuts must be prepared in advance; if they have a film on them, it is advisable to dry them in a hot frying pan (then the film will separate well) and peel them. 
By this time, our thick chocolate mixture has cooled moderately. You need to pour it over the nuts in the tartlets; it’s very convenient to do this with a Turk with a spout. 
Nuts that do not have a place in the tartlets must be coarsely crushed with a masher to sprinkle the candy with crumbs. You can enjoy it 20 minutes after preparation, when the chocolate mixture has completely cooled and slightly softened the wafer tartlets.
Other recipes
On our website you can find many other recipes with photos of sweets prepared at home.
To prepare them you will need: raisins and flour, cocoa powder and granulated sugar, milk and butter. The candy mass is prepared in a water bath, then half of it is poured into molds, raisins are placed and the rest of the candy mass is filled on top. They are put in the freezer overnight and the candies are ready by morning. 
To make such sweets you will need dried apricots and peanuts, honey and a bar of dark chocolate, a piece of butter and colored confectionery sprinkles for decoration. Dried apricots and peanuts are ground in a blender and mixed with honey. Future candies are formed from the resulting mass, which will then need to be dipped into a mixture of dark chocolate and butter melted in a water bath. The candies that have not had time to harden are sprinkled with decorating confectionery toppings and sent to the freezer to harden. 
To prepare such a delicacy, you will need: a banana and a pack of cookies, walnuts and condensed milk, yogurt and cocoa (or powdered sugar) for decoration. Crushed cookies and walnuts are mixed with boiled condensed milk and yogurt. The resulting mass is laid out on cling film, leveled, half of a banana cut lengthwise is placed on top and the whole thing is rolled into a sausage. The frozen sausage is cut into sticks, each of which should be dipped in cocoa powder or powdered sugar. 
For such sweets you only need nothing: dark chocolate with butter, ground cinnamon with kernels walnuts and almonds, cocoa powder for sprinkling. A mass of chocolate, cinnamon and butter is prepared, when it hardens a little, candies are formed from it, nuts are placed in the middle of each, the candies are sprinkled with cocoa powder and harden in the refrigerator. 
To make these sweets you will need: sugar and water, egg and raisins with nuts, powdered sugar and coconut. A caramel mixture is prepared from sugar and water, mixed with chopped walnuts. From the cooled mass, rafaelki are formed, in the middle of which raisins are placed. The resulting balls are rolled in a mixture of coconut flakes and powdered sugar. In 40 minutes the candies harden in the refrigerator and are ready to eat. 
Here you will need chocolate and butter toffee, water, butter and instant coffee. A mixture of toffee, water, instant coffee and butter is prepared in a water bath. Then it is poured into molds. The frozen toffee is dipped into the melted chocolate mixture and cooled in the refrigerator for a couple of hours. 
To prepare this delicacy you need prunes, walnuts and dark chocolate. Each prune is filled with a piece of walnut, dipped in chocolate heated in a water bath and cooled in the refrigerator for an hour. 
You can also use a homemade marmalade recipe. There is nothing simpler here at all. Will be required fresh berries(for example, strawberries), water and gelatin, citric acid and powdered sugar. The berries are crushed in a blender with citric acid and powdered sugar, combined with swollen gelatin and poured into molds. When they have hardened, all that remains is to cover them with glaze for even more taste.

There are many more options for homemade sweets:
These can be sweets with other dried fruits, for example, figs or dates.
- Homemade waffles covered in chocolate.
- Homemade lollipops (remember our Soviet cockerels?).
- Chocolate and honey candies.
- Cranberry candies.
- Apricot-coconut delicacies.
- Homemade marshmallow.
- Homemade Turkish delight.
- Sweets "Lakomka" from baby food.
You can use powdered milk in making sweets; you can replace regular milk with it if necessary. IN as a last resort, if you have neither one nor the other, and by a lucky chance you are a young mother, and you have Baby formula, you can use it.
Such a masterpiece can be an excellent gift for your family and loved ones.
- To wish Happy New Year, form candies in silicone molds in the shape of a star.
- For Valentine's Day, hearts are a natural choice.
- The best way to congratulate your mother or friend on March 8 is with candies in the shape of flowers.
After congratulating your loved ones, do not forget to warn that it is better to store sweets in the refrigerator so that they do not melt. Although it's unlikely, such yummy food won't last long.
You can also make a gift box with your own hands, you just need to turn on your wild imagination and put a drop of your soul into the souvenir. A box of handmade chocolates tied with a bright satin ribbon or openwork braid will show you as the best master of culinary masterpieces and loving daughter, spouse, mother.
Hello, my dear readers and blog guests! Homemade sweets are a strong competitor to store-bought sweets - any gourmet will confirm this fact. Homemade treats are favored not only by naturalness and freshness, but also by the wonderful opportunity to select ingredients in accordance with family preferences. And today I will share with you the secrets of preparing the most delicious and original delicacies!
How to make candy at home
Having prepared one of the dishes I offer at home, you will definitely not remain indifferent.

DIY candies “Bird's milk”
Product set:
- Butter (100 grams)
- Dark chocolate (1 bar)
- Granulated sugar (to taste)
- Gelatin (15 grams)
- Fresh chicken whites (4 pieces)
Cooking technique:
- Pour a spoonful of gelatin with 100 milliliters of boiled water (it should be at room temperature). After waiting for swelling, place the composition on the stove and bring to a boil.
- Now you need to thoroughly beat the whites with sugar (the amount of sand is adjusted to taste). Add the cooled gelatin mass in parts.
- Break the chocolate bar. Add the butter and melt the sweet pieces in a water bath. If you wish, you can cook homemade glaze - it will adequately replace a store-bought dessert.
- Separate half of the chocolate mixture. Spread it on the bottom of a deep baking tray lined with baking paper, and then immediately put the container in the refrigerator.
- When the chocolate has hardened slightly, it’s time to add the fluffy protein mass. On top of it you need to pour the remaining glaze, preheated to a warm state.
- Place the mold in the refrigerator and wait for the chocolate shell to completely harden.
- Next, the dessert is cut into pieces of the desired shape. The most delicate souffles are in perfect harmony with tea and coffee!
Wafer sweets at home
Product set:
- Dry baby formula "Malyutki" type (1 glass)
- Coconut flakes or cocoa powder (for dusting)
- Butter (80-100 grams)
- Wafers with any filling (200 grams)
Cooking technique:
- Divide the waffles into layers. Carefully remove the filling: it must be combined with softened butter.
- Pour in the baby formula in small portions - the end result should be a thick, dense mass. Roll into balls of the same size.
- Crumble the “emptied” waffles, and use the resulting crumbs to bread the sweet rounds.
- To finish, the candies can be rolled in coconut flakes or generously sprinkled with cocoa - depending on your personal taste!

How to make “Korovka” candies at home
Product set:
- Citric acid - you can take freshly squeezed juice (half a teaspoon)
- Milk (1 glass)
- Honey (45 grams)
- Butter (a couple of tablespoons)
- Granulated sugar (one and a half to two glasses)
Cooking technique:
- Boil the milk in a small saucepan.
- Add 25-30 grams of butter. Add sugar at the same time.
- Mix the mixture thoroughly and wait until it boils again.
- Continue cooking the sweet mass until thickened. Then stir in lemon juice and honey.
- After 35-40 minutes, the saucepan can be removed from the heat. Distribute the candy base into molds (a container for regular or figured ice is suitable).
- Refrigerate the mold until completely frozen. When tasting homemade “Korovka”, you will certainly be amazed by the delicate texture and amazing taste of the delicacy!
Dietary pumpkin candies
Product set:
- Pumpkin puree (1 cup)
- Ground cinnamon (half a teaspoon)
- Ginger powder (on the tip of a knife)
- Butter (50 grams)
- Ground nuts (half cup)
- Granulated sugar (200 grams)
- Salt (quarter teaspoon)
- Cocoa powder (15 grams)
- Milk (200 milliliters)
- Vanilla sugar (1 teaspoon)
Cooking technique:
- To make the puree, cut the pumpkin into slices, bake in the oven until softened and puree thoroughly in a blender.
- Place the vegetable mixture in a saucepan, accompanied by sugar and vanilla. Add salt and pour in milk. After mixing, place the mixture on the stove and cook over high heat until it boils.
- Now reduce the heat to low and leave the mixture to simmer for another forty minutes. From the beginning of caramelization, the mixture must be stirred continuously, otherwise it will burn.
- Ultimately, the mass will begin to resemble marmalade and will begin to easily separate from the bottom of the container - it’s time to remove it from the stove.
- Add a couple of tablespoons of butter and a small portion of crushed nuts. To flavor, add aromatic spices - cinnamon and ginger.
- Place the homogeneous mixture into a bowl. Cool and put in the refrigerator for a couple of hours.
- Combine the remaining nuts with cocoa powder and use for breading: separate the candy mixture with a teaspoon, roll into balls and roll generously. Dessert rounds should be stored refrigerated.

How to make lollipops at home
Product set:
- Diluted citric acid (half a teaspoon)
- Granulated sugar (250 grams)
- Water (half a glass)
- Fruit juice (1 tablespoon)
- Powdered sugar (in large quantities)
- Food coloring of any shade
Cooking technique:
- Heat sugar and water in a thick-bottomed saucepan. After the syrup has boiled a little, drop a little liquid directly into the saucer with cold water-When it begins to thicken, the dishes can be removed from the heat.
- Mix in any flavoring of your choice - it can be fruity / berry juice, milk, cocoa or coffee.
- Add food coloring, and citric acid, dissolved in hot water 1:1. Stir thoroughly.
- Spread the powdered sugar on the baking sheet – there should be a lot of it.
- Now take any round object of suitable diameter (the size of the lollipops will correspond to it). Press into sweet powder to get a clear impression. Make indentations in a checkerboard pattern.
- Place the sticks under the lollipops and fill the holes with syrup.
- Expect the sweets to harden. In the future, to prevent the candies from sticking together, they can be generously sprinkled with powdered sugar.
“Drunk” candies for adults
Product set:
- Light rum (2 tablespoons)
- Butter (50 grams)
- Almonds (half a cup)
- Cherry liqueur (20 milliliters)
- Chicken egg (1 whole + 1 white)
- Dark chocolate (150 grams)
- Powdered sugar (half a cup)
- Milk chocolate (20 grams)
Cooking technique:
- Boil and peel the egg. Beat the butter until it turns white; then combine with boiled yolk and grind until as smooth as possible.
- Add a tablespoon of different types of alcohol. Liqueur can be any kind, but cherry is still preferable.
- Dark chocolate must be melted in a water bath (set aside a few cubes for making marzipan). Then he also joins the lineup.
- After thorough stirring, the filling goes into the refrigerator for the next hour.
- Meanwhile, peel and crush the nuts into fine crumbs (to easily remove the husks from the almonds, steam them with boiling water for 5 minutes). Pieces of dark chocolate also need to be crushed on a grater.
- Add the remaining rum, sweet powder and raw protein. Stir the mixture with a mixer or blender for three minutes, then put it in the refrigerator for an hour.
- After cooling, you need to make a neat “sausage” from the almond marzipan (be sure to spread baking paper on the countertop).
- Cut the workpiece into equal parts and roll into round pieces. Turn them into cakes, then spread the filling and seal the edges, forming sweet balls with filling.
- Grate the milk chocolate and roll the candies one by one. The treat is ready to serve!

How to make curd sweets with strawberries at home
Product set:
- Cottage cheese (250 grams)
- Fresh or frozen strawberries (1 cup)
- Sweet shredded coconut (a couple of tablespoons)
- Butter (30 grams)
- Breadcrumbs (for sprinkling)
- Chicken egg (1 piece)
- Granulated sugar (75 grams)
- Flour (1 cup)
Cooking technique:
- Beat the egg with granulated sugar. Add cottage cheese and butter, still whisking.
- Add flour and knead the curd dough.
- Divide the base into small parts and form them into flat cakes.
- “Plant” one strawberry for each blank. Roll into round pieces, dusting your hands with flour for convenience.
- Now the “koloboks” need to be immersed in boiling water so that the curd “sets”. Keep them on the stove for three minutes after surfacing.
- Remove the balls using a slotted spoon. Bread each candy in a mixture of crumbs and coconut.
DIY butterscotch with sour cream
Product set:
- Honey (half a glass)
- Granulated sugar (1.5 cups)
- Softened butter (100 grams)
- Sour cream (one and a half cups)
Cooking technique:
- Mix sugar and honey and set over medium heat. Wait until it boils, stirring the ingredients continuously.
- When the mixture acquires a beautiful amber hue, remove the dishes from the stove.
- In a separate container, bring the sour cream to a temperature of 80 degrees. Then add to the sugar-honey mass.
- Add soft butter. After thorough mixing, return the mixture to low heat and simmer for several minutes with constant stirring.
- You can test the readiness like this: scoop up some of the sweet mixture with a spoon, put it on a plate and wait a little - the toffee should soon harden. If necessary, you can add more honey or sugar.
- Take baking paper and line the surface of the baking sheet. Treat the parchment with vegetable oil, lay out the candy mixture and smooth it out well.
- After a quarter of an hour, all that remains is to cut the iris and serve it with fragrant tea.
Orange candies at home
Product set:
- Semolina (30 grams)
- Peanuts (50 grams)
- Orange (1 fruit)
- Powdered sugar (15 grams)
- Water (50 milliliters)
- Sugar (80 grams)
- Egg white(1 piece)
- Pastry powder (optional)
- Lime (1 piece)
Cooking technique:
- Rinse the lime and orange thoroughly. Remove the zest from the orange fruit and squeeze the juice from the remaining pulp.
- Now squeeze out the juice from the lime. In total, for dessert you will need half a glass of fresh juice - mixed orange and lime.
- Pour the juice into a small saucepan or sauté pan. Add the chopped zest and granulated sugar, add a quarter glass of water.
- Heat the mixture over low heat with constant stirring. After boiling, keep it on the stove for another three minutes.
- Start adding semolina in small portions. Boil the mixture until thickened - usually about five minutes.
- Crush the nuts with a blender and add to the manno-citrus porridge.
- Roll balls of arbitrary size. Place the products on a plate and refrigerate until set.
- Making delicious glaze for homemade sweets is a couple of trifles: just whisk chicken protein with sweet powder.
- Additionally, colored confectionery powder will help decorate the orange balls.
Delicious sweets for diabetics at home
Product set:
- Dried figs (140 grams)
- Sugar substitute (to taste)
- Walnuts- optional (half a glass)
- Chickpeas or lentils (1 cup)
- Cocoa powder (20-30 grams)
- Water – can be replaced with cognac (60-70 milliliters)
Cooking technique:
- On the eve of cooking, the beans must be soaked in cool water - leave them overnight. It is advisable to do the same with the figs so that they soften well.
- Pour a glass of water over the washed lentils or chickpeas. Boil over moderate heat for 50-60 minutes until fully cooked.
- Drain the liquid and let the beans dry. Next you need to chop them with a blender.
- When chopping dried fruits, it is recommended to leave some medium-sized slices - it will be tastier.
- Nuts are added as desired. If you approve this product, it will have to be crushed carefully.
- Mix chickpea base, figs and nuts. Add sugar substitute and stir everything well.
- When you have a completely homogeneous mass in your hands, you can safely form the products. Give the candies any shape you want.
- For greater beauty, the dessert delicacy should be generously sprinkled with cocoa.
Now you know how to make candy at home. I hope you liked the treat recipes. Bon appetit and see you again!
